Shutterstock Editor is the easy design app for creating professional-looking content for social media, presentations and more. Image filtering is a crucial feature for any image-based design tool, and Shutterstock Editor provides robust support for it. This post outlines how we provide performant filtering within the constraints of various browser and hardware limitations.
Filtering in Shutterstock Editor
 Shutterstock Editor’s image filtering interface
Shutterstock Editor performs two types of filtering: applying presets, which we call “filters,” and a series of task-specific filters called “effects,” e.g. contrast or blur. Filters and effects are applied in a series, in the same order in which they appear in the UI. Because Shutterstock Editor currently has ten different filters, up to ten filter steps may need to be performed on an image at any given time. Because “presets” themselves are generally composed of several individual filter steps, the true number of processing steps can be twenty or more.
 Filtering performance is extra important because our filter UI is based on sliders
Our “effect” UI is slider based, so filtering performance really impacts user experience. Because of that, we strive to perform filtering at 60 frames per second. 1000 milliseconds divided by 60 frames per second yields a rendering budget of 16ms per full image filter. Splitting that budget across twenty individual filter render steps leaves less than one millisecond per step. JavaScript is fast, but users are faster, so we use GPU processing where possible to hit this target and do the best we can when only the CPU is available to us.
Using the CPU
To demystify the process of filtering, let’s walk through how we perform CPU-only image filtering. Shutterstock Editor keeps images on HTML Canvas elements, meaning that specific image data can be retrieved using the getImageData method of a rendering context. This data takes the form of a one-dimensional array of pixels, where each pixel is stored as four consecutive integers representing its red, green, blue, and alpha channels. Therefore, to apply a filter using the CPU, we need to:
- Copy the image data to an array of pixels using
getImageData; - Loop over the array, one pixel at a time, applying a filter algorithm to each pixel. A simple filter could simply add a constant to each color channel; converting an image to grayscale could be simply averaging the colors together and applying the same value to each color channel;
- Loop over the array again for each additional filtering step; and
- Place the resulting array back on the canvas using the
putImageDatamethod.
On modern computers (e.g. MacBook Pro i7 with Chrome 56), filtering with the CPU in JavaScript takes from 40 to 120 ms per filter on a standard 1500px image. These filters stack up quickly, and because this processing is performed in the main UI thread, they are blocking operations. So, while using the CPU is a straightforward fallback, we have a strong motivation to use the GPU when possible.
Using the GPU
The same assets on HTML canvases can be processed from the GPU by using WebGL and shaders. In this case the process is:
- Create a texture object for the image, to be stored in the GPU memory;
- When a filter is used for the first time, compile the code in a binary format compatible with the GPU;
- Run the compiled program over the texture via the GPU, processing pixels in parallel;
- Run one program for each filter, just as above with CPU processing; and
- Place the resulting texture onto the HTML canvas again
This process is similar to CPU filtering, but much faster. Running an image through one filter takes from 0.2 to 0.4 ms on the same computer as above. Because much of that time is spent copying data from the DOM into the GPU and back, even many filters applied in series can be performed without sacrificing 60 fps rendering.
The Quirks of WebGL
Of course, there are some downsides to WebGL:
- WebGL implementations vary across browsers, operating system hardware drivers, and hardware;
- Error handling is limited;
- Learning curve – WebGL programming has a narrow set of operations and one has to learn to think in its terms;
- Texture dimensions are limited, so filtering large images requires special processing. More on that below
So, where WebGL is unavailable, not able to support our use case, or throws a fatal error, we fall back to CPU filtering.
How WebGL Filtering Works
Let’s take as an example a user that wants to move from the top image to the bottom one. To do so the user plays with the filter panel until they have their desired result, getting a filter configuration as shown in the picture:
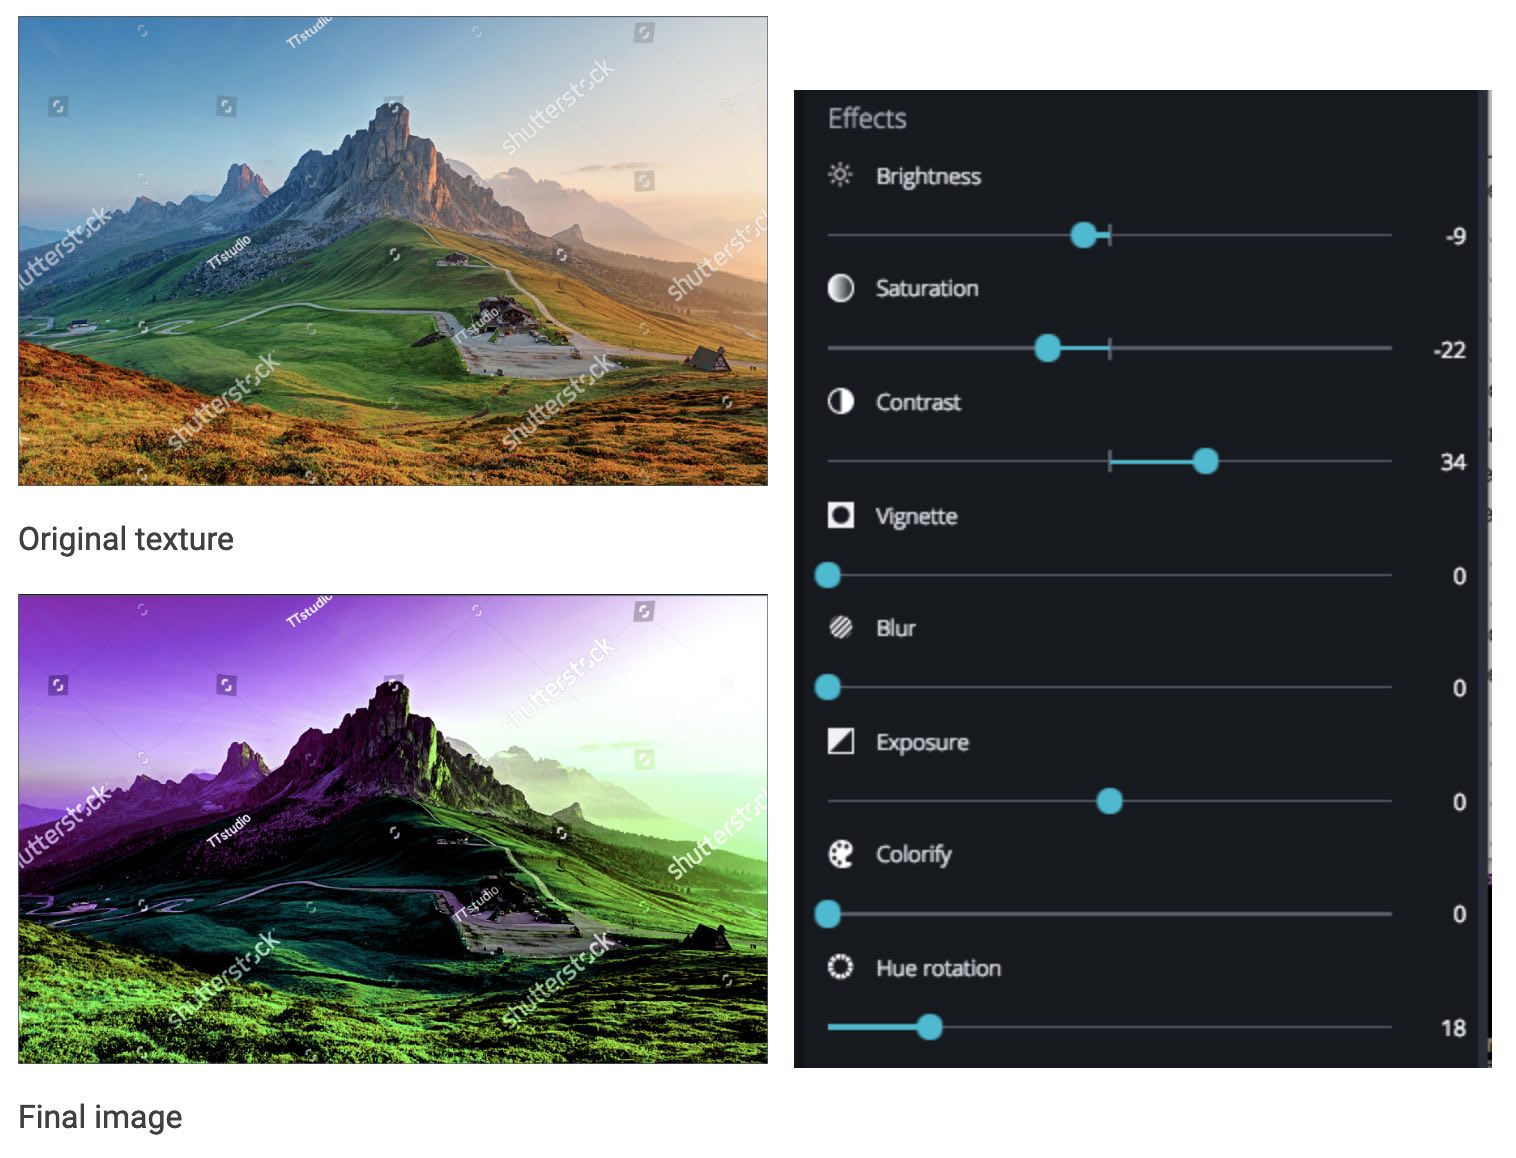
To achieve this output, the original image is uploaded to the GPU as a texture. We’ll call it originalTexture. Two other empty textures (textureA and textureB) are created with the same size as the image. We then process our image from one filter program to the next, ping pong-ing the output between textureA and textureB, until the entire filter chain has been executed.
Once the final filter has been run, we write the output of textureB to an HTML Canvas element. If any of the filters in the chain get modified, we repeat the process, starting from originalTexture. It would be possible to retain intermediate processing steps by trading off storage space (the number of intermediate textures to store) for performance gains (the cost of starting each render at the top of the filter chain); however, for GPU processing, filtering performance is rarely an issue.
Filtering Big Images
Shutterstock assets can be big. Shutterstock image dimensions are regularly larger than 8,000px x 5,000px, and user assets can be even bigger. To keep Shutterstock Editor speedy, we use smaller preview images most of the time. Only when a user performs a final render do we absolutely need to filter high-resolution images. Nevertheless, that filtering step is just as important as any. To process those large images, we have to work within some constraints:
- Depending on the browser, the maximum canvas size along either dimension spans from 5,000px to 12,000px;
- Depending on the hardware, maximum WebGL texture size varies from 2,048px to 16,384px
Therefore, for large images, Shutterstock Editor filters 4 megapixels at time by breaking images into tiles, each sized 2048px x 2048px. This size works across most hardware and all major browsers, and permits most preview images to fit within a single tile, meaning that we essentially bypass this tiling except when performing a final render using full-sized images.
How We Filter Using Tiles
So, how do we filter images using tiles when we need to? Your natural first thought might look like this:

A large image is broken into a series of neighboring tiles, each small enough to fit within a WebGL texture. However, this setup does not work for Shutterstock Editor, because of filters like blur.
Filters like blur require awareness of nearby pixels in order to operate. At the edge of tiles as drawn above, those nearby pixels are missing. The integrated logic of WebGL or 2D drawing can mirror the pixels from the edge, creating a credible blur effect for a standalone image, but when those tiles are then stitched back together, the blurs at the edges of two neighboring tiles do not mesh:
 The blur of two neighboring tiles do not mesh, leaving a crease down their shared edge
Therefore, to perform blurring, it’s necessary for tiles to overlap. A setup that meets our needs looks like this:
 Dividing an image into six tiles. Note that the tiles overlap and leave no whitespace.
The image is broken up into tiles according to two important rules. First, where tiles meet, there is an overlap equal to double the size required by the filter. For example, if a blur filter has a radius of 10 pixels, the overlap between any two tiles must be at least 20 pixels.
Second, all edges of a tile that do not overlap with other tiles must terminate at the edge of the image. This ensures that there is no empty space in any tile, keeping the per-tile processing as simple as possible.
After processing, tiles are joined back together, each tile providing half of the data for the overlap. That’s why it’s essential for the overlap to be double what’s required for the particular filter: at the center of the join, both tiles must share the exact same data in order to avoid a visible crease along their border.
Conclusion
Filtering images can be straightforward, even in the browser. But providing a wide range of performant filters to a broad audience is a substantial task. Shutterstock Editor achieves this by maintaining parallel filter implementations in both JavaScript and WebGL, by re-using GPU textures as much as possible, and by breaking large images into overlapping tiles that any hardware and software combination can manage.